Tuesday, January 26, 2010

The Third Flatiron!

Last Friday I had to run down to Boulder to pick up my new (used) skis. Well, I hate to waste a trip to the front range so Brent and I cooked up the idea of climbing the Standard Route on the Third Flatiron. According to the guide book, this may be the best 5.4 route in the world. This route has been on my list for many years now. The route itself is really easy. In fact, I have seen a picture of someone climbing it in roller skates! The draw of this route is it's length. The guide book lists it as 8 pitches long and I think the route is roughly 800 feet of elevation gain. Pretty long route, especially for these current short days. For conservative estimates, we tend to allow about an hour per pitch on route we have not been on. So the plan was set for Brent to pick me up at 6am and hope our fingers don't freeze off. The weatherman predicted a high of mid 30's and some clouds but no wind! Oh, and this faces due east so it goes into the shade around noon, making it pretty cold.

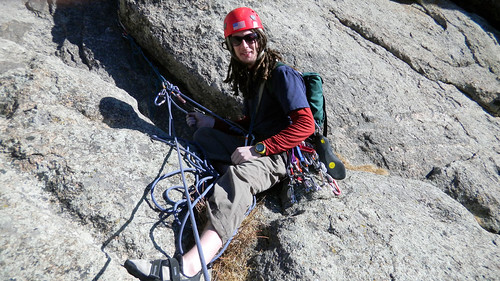
As usual, Brent showed up at 6:10 and we were on the road by 6:15. We rolled into the parking lot at about 7:10 and boy was it frosty! The sun was supposed to be up at 7:18 but with all the clouds out east, it didn't matter. We donned the packs and headed out into the frosty dawn. Soon we encountered the most scary aspect of the whole day: icy trails. I spent quite a bit of time regretting not bringing my shoe chains. Unfortunately, I left the camera on the kitchen table so all I have to show for the day is these crappy cell phone pics. It looks like I need to clean my lens! Here is Brent on the icy approach. It looks mellow but the trail part was pure ice and falling in those boulders would probably leave a mark.


We arrived at the base of the climb, racked up and cast off, leaving right at 8am. I took the first pitch and headed off into a sea of rolling pink granite. Trip reports on the web talk about people doing massive runouts and placing only 4 pieced on a pitch. Being a sissy, I was pretty skeptical that this was true or reasonable. However, it was true. The climbing was so easy and secure.10 minutes and three pieces later I was at the huge bolt marking the first belay. I clipped in and yelled off belay. Brent looks a little confused and yells back that I still have half the rope left. Allrighty! Lets see if I can get to the next belay and wrap these two pitches together. 2 more pieces and another 10 minutes and I find the next belay with 2 feet of rope to spare. I back the huge bolt up with a cam, and call down to Brent. He runs up the slab, cleaning the 6 pieces of pro in 200 feet of climbing. Two pitches in a little over a half an hour! We were rocking! Now if the sun would just burn off the clouds.
Brent takes the rack for the next pitch. After a bit he find the bolt marking the next belay. Since he still had about half a rope left he also decides to try to wrap two pitches into one. Unfortunately, the second half did not go quite as smooth. Since there is no distinct path, it is hard to find the bolts marking the belays and he kind of got a little lost looking for the next bolt. And then he ran out of rope. But after a bit of simulclimbing and traversing around he finally landed on the bolt and brought me up. By this time the sun had burned through the clouds and we stopped shivering.
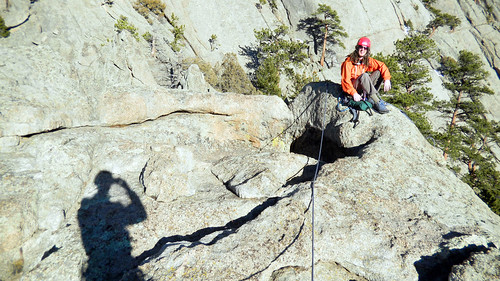
The rest of the route was pretty much more of the same. I managed to wrap the next two pitches into one. Then it was a short wandering pitch for Brent and finally my last pitch to the summit. The last 30 feet to the summit did grab my attention. It turned into a fairly smooth slab with no options for gear. This bit of the route does get an R rating but it went fine. Here is a shot of Brent pulling up to the summit.

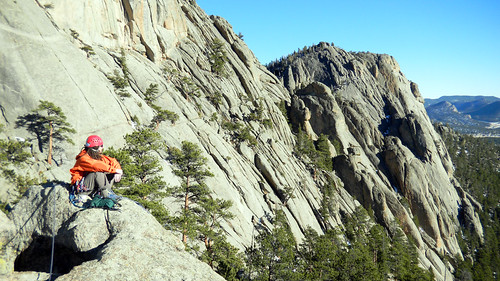
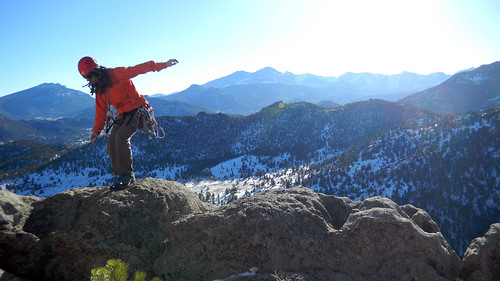
We reached the summit right at noon. The summit of the Third Flatiron is pretty spectacular. You literally tower over the plains to the east. It is small and exposed. In this picture you can see the First Flatiron just to the right of my hand. The summit we are on is similar but smaller and higher.

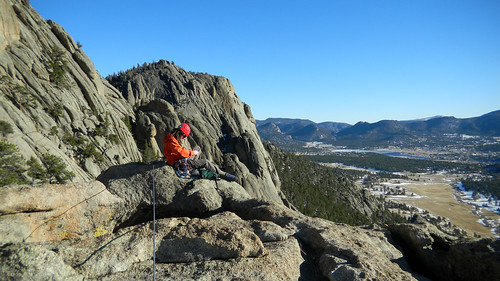
And here is a shot looking east.

Sorry there are not more pics. I was hesitant to pull out my phone during the climb because it is kind of hard to hold onto sometimes. Anyhow, the excitement was not over yet. It takes three somewhat short but still exciting raps to get back to the ground. The hike back to the car took 2.5 more hours because of the treacherous icy conditions on the trail. Brent was literally crab-walking down the trail for a good half mile.

We got back to the car with that proud summit feeling and met Molly at Mountain Sun for some burgers and brews to celebrate. Being an relatively new Colorado resident I am still enthralled that we can get on an 8 pitch route in January. In Iowa, the cold made it hard to climb 50 feet!

New Skis!

Well, I finally made the switch from Tele skis to AT skis. For those not familiar with the difference, Tele skis (typically) use rigid plastic boots but the heel is never attached. This allows you to cruise along on the flats and climb up hills with skins. Here is Molly's Tele setup.


AT (aka Alpine Touring) also use rigid plastic boots but the heel can be fastened or released with the flip of a lever. The idea is that you release your heel for skinning up the hill and then lock it down for the downhill parts. Here are my new (used) AT binding and my super sexy new (also used) boots. Here the heel is locked down

Here the heel is freed by flipping that black lever up

I tried a season of Tele and never really felt confident on them. In fact, I never had any fun on 'em. I was always fearing crashing of plowing into trees. This morning Molly and I took the new skis and AT binding out for a test run, though we had a hard time finding enough snow. Ski Road was melted out so we headed to Hidden Valley. The snow there was pretty patchy but we managed to find a small hill to take a couple runs on. Right away, I was sold. Skinning up was easier because the binding actually pivots during the stride instead of just bending the boot. And skiing with your heels actually attached is so much easier! Sorry to all you hardcore Tele guys but I am too lazy and uncoordinated. Oh, another huge benefit is that AT bindings will actually release in a bad crash, saving your knees from an early retirement.

Thursday, January 14, 2010

Salud and Magic Chrome Plated on the Pear

Last Tuesday, Brent and I busted out for a long climb out on the Pear, up at Lumpy. The weather was supposed to be great, at least for January. 50 deg, sunny and just a touch of wind. Sounds perfect!

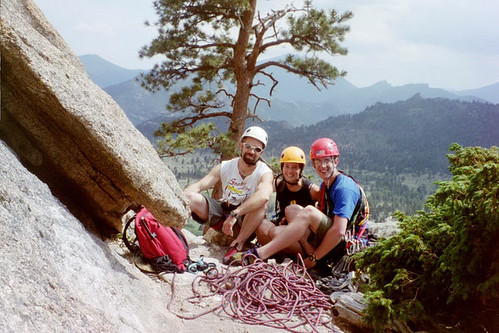
The classic route on the Pear is a route has the strange name of Magical Chrome Plated Semi-Automatic Enema Syringe. It is 5 pitches long but most people only do the first two pitches and then walk off on a huge ledge to the left. Way back in 2002 (I think) I did the first two pitches with Molly and Mike. In fact, here is a pic from way back when. Whew, look at how short my hair is!
image264

The last November, Brent and I did the first two pitches again, this time a different way. It was about time to finish this route and do the final three pitches to the top. Since we had done the first two pitches we opted for a different route to start with. It landed on the same ledge as Magic Chrome did so we would just link up with it there. This alternate start is called Salud and goes at about 5.8. This route starts on a ledge that the guide book says you get to by an easy 3rd class scramble. Well, it is probably mellow without snow but with snow, it is pretty scary! It's funny how the approach can often be scarier than the climb itself. Here is Brent negotiating the worst of it.
DSCN0725

This scary snow climb in tennies is followed by tunneling under boulder, complete with ice and snow.
DSCN0726

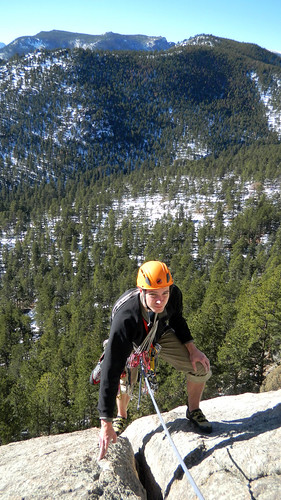
Finally, it was time to climb! I struck out on the first pitch which was a mixture of bolts and gear. Wow, it was a really nice climb. Run out in the easy spots but gear just where you needed it. I should note that this what my first climb in my new shoes, TC Pro's. I was not sure how they would work so I ended up bringing my old trusty 5.10's along also. In fact, I chickened out and wore my 5.10's up the first pitch. I sure did not want to find out that the new ones were not that great on a run out 5.8 slab climb! Here is a shot looking down towards Brent on the first pitch.
DSCN0731

And Brent pulling up onto the belay
DSCN0733

Me at the belay. By the way, you can read about my little green pack here

DSCN0734

Well, as usual, I forgot to take any more pics until Brent grabbed the camera when we were on the summit. The route was great. Most of the pitches were pretty easy with one last semi-hard section on the last pitch (5.7). Here are a collection of summit shots. Oh, and the TC Pro's are SICK. I have not climbed in LaSportiva rubber in a long time. These puppies stuck like velcro to the rock. Very pleased with them
DSCN0736
DSCN0737
DSCN0738
DSCN0742
DSCN0746
DSCN0747

The rap off the summit was this cool drop into a corridor behind the pear. This looks like a great spot for some summer climbing.
DSCN0750

Sunday, January 10, 2010

Ultimate Lumpy Pack

Over the cold months I have been thinking of the ultimate pack for climbing. Now, I know that is a pretty bold claim and am well aware that my "ultimate pack" is considerably different than what others will consider to be ultimate. Before you start booing me let me give some background on why I consider this to be the end-all climbing pack (kind of).

Living in Estes Park, I find that I spend a considerable amount of time climbing up at Lumpy Ridge. Typically the routes I like to climb are longer than a pitch and require a walk off. Further, it should be noted that I am a slow climber and hate to get up early. If you combine these variables with typical Colorado summer weather (storms in the afternoon) you may start to see how my climbs usually culminate: hunkering down on a ledge hoping that I don't get hit by lightening, followed by a downhill suffer-fest descent in my too-tight climbing shoes. During the colder months I get to trade the fear of lightening for shivers and enjoy the added element of snow on the walk-off. If you have not experienced wading though snow in your climbing shoes you should definitely try it. It will change your life.

So now imagine you are standing at the bottom of a climb that may take 2-6 hours. The weather is either A) looking like it may storm or B) warm enough when you are moving but induces tremors when sitting. The descent is a steep, loose gully that may or may not have snow in it. Harder men than I will simply say climb fast and quit your whining. I am not a hard man so I am stuck with either trying to hang my jacket and shoes off my harness (fail) or wearing my approach pack containing only a pair of shoes and a jacket (awkward).

This very situation was presented to me last November while standing at the base of the Pear. As usual I opted for the hard-man approach. And, as usual, it sucked. During the walk out when the shivering had stopped and I had regained feeling in my feet I decided there had to be a better way. I poked around Neptune's, checking out the climbing packs but none of them really matched what I wanted. I wanted something that will simply carry my descent shoes, a jacket, and perhaps a headlamp but does not require me to carry two packs to go climbing. I wanted a something that was a pack when I needed to to be but otherwise took up very little space or weight.

Thus an idea was spawned. Why not make my own pack? I have been messing around with sewing my own lightweight backpacking gear so why not apply that to my climbing pack? The specs were simple:
1) Must be able to carry my Chaco's in the summer, approach tennies in the spring/fall, and boots in the winter

2) Must be able to carry my rain jacket in the summer, soft shell in the spring/fall, and down vest or polartec jacket in the winter (I wear my soft shell while climbing in the winter)

3) Must not interfere with my sissy-sized (i.e. large) trad rack or chalk bag and must not hinder arm movement.

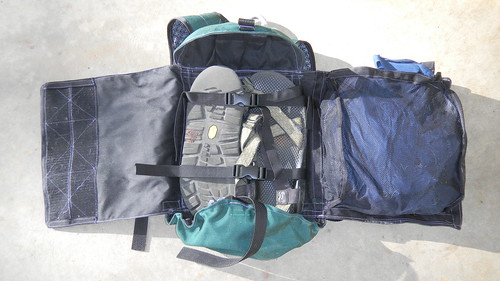
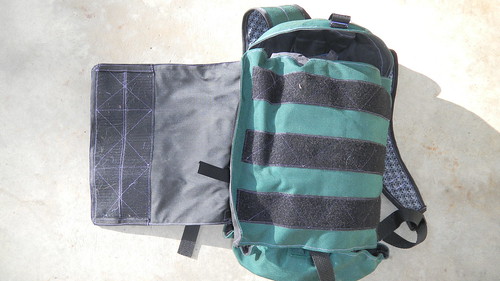
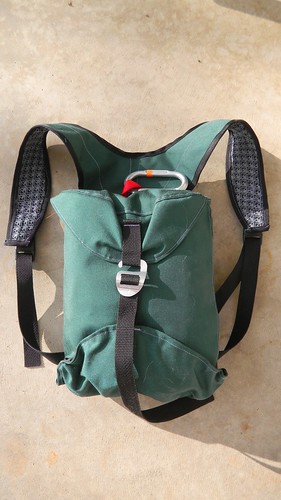
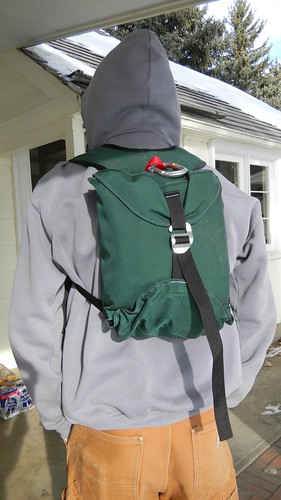
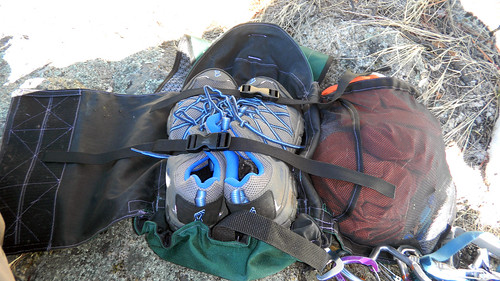
So the R&D began and I quickly realized that the shoes could be used to create the frame of the pack if packaged correctly. Further, I wanted the shoes as near to my back as possible since they will be the heaviest item in the pack. I ended up with a "burrito" style closure with heavy duty velcro, directly inspired by Timbuc2 messenger bags. It was important that I could get to the jacket without accidentally dropping the shoes, so the shoes are buckled to the pack while the jacket (and headlamp if needed) is stuffed into a large pocket on one of the closure flaps. All this is packaged up nicely with a top and bottom lid and sealed with one of those awesome and indestructible Metolius buckles that you find on their crash pads. For materials I used Cordura 1000d (green) for the outside and 330d (black) for the inside. This pack may stop a bullet. I also added some wicking fabric to the parts of the pack that touch me. Finally I added a strong attachment point (the red loop) and quick release buckles to the shoulder straps. I went back and forth on the buckles quite a bit. Last thing I want is for this pack to fall off in the middle of a climb. Ultimately I decided that it would be pretty unlikely for both buckles to come undone and it would make it easier to remove the pack if I had thrown a bunch of slings over my shoulder. Plus, the pack is so short that it is sometimes hard to get it your arm in and out of the shoulder strap, especially when squeezed onto a small belay ledge.

OK, enough chit-chat. Lets get some eye candy. Here is what the pack looks like for my summer set-up. It will carry my trusty Chaco's (with the gum for emergency situations) and my Mt Hardwear Epic rain jacket on the left. I could easily add a cliff bar and a headlamp also. Note the sandals are securely strapped in and will not fall out when accessing the pocket.
DSCN0683

To seal up the pack you flip the jacket flap over the shoes like this:
DSCN0685

The flip the other flap over and seal it up with the buckle. It this pic you can also see the strong attachment point and the wicking fabric on the inside of the shoulder straps.
DSCN0681

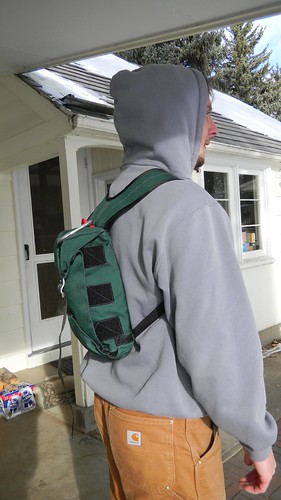
And finally a couple pics of me looking awkward while wearing the pack. Note how is rides high so as not to interfere with my harness/chalk bag and is narrow enough to not limit my arm movements. Note to self, need to shorten that strap. In the second pic, it looks like I did not have it tightened up enough. It is kind of low. But it shows how thick the pack is.
DSCN0688
DSCN0686

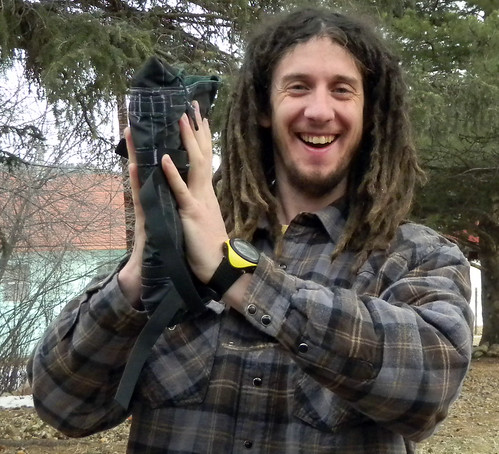
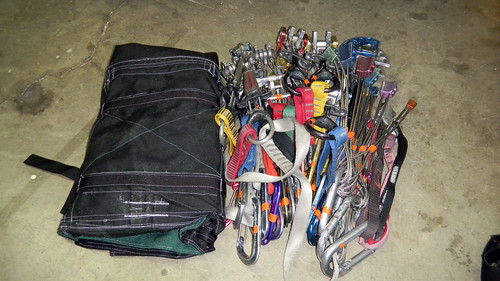
I found that I can kind of turn it inside out and make a nice little package with it. Not sure the final weight but it is quite light and packs down nicely. I would say it is comparable to my Patagonia Ascensionist softshell, which weighs in at 18 oz. Here are a couple pics of the pack when not in use.
DSCN0723
DSCN0753

Well, theory is great but what about practical application? I guess I'll have to go out and climb something. Bummer! Since I was inspired on the Pear, I though it was only fitting to try it out on the Pear. Fortunately, we got a perfect January day last Tuesday. 50 degrees, no clouds and only a bit of wind. Gotta love winters in Colorado. It was exactly what the pack was designed for. I had my tennies for the approach and descent, both of which had quite a bit of snow to negotiate. On the descent we were wading through knee deep snow in the corridor behind the Pear. It would of been rough in climbing shoes, especially since the route was about 700' long. For a jacket, I had my Patagonia Ascensionist softshell. Which also worked out perfect because the wind kicked up. Here is a pic of the pack before liftoff.
DSCN0729

And a shot showing the pack after the first pitch
DSCN0735

You can see more pics from the climb here.

Final Verdict? Pretty sweet. I never felt like it was in the way. In fact, I hardly noticed it at all. It would probably be a bummer in a chimney but what can you do about that? I do wish I would of put a zippered compartment on it somewhere to hold my headlamp and cliff bar. It felt like they could slip out of the jacket pocket when I was pulling out my jacket. The easy solution is to just zip them up in my jacket. In the hotter months I'll probably have to carry water but a smaller bottle like you carry on your bike will fit nicely in the jacket pocket. A little elastic loop may be on order to keep it upright. Also, I wish it had a more convenient handle.

DSCN0737